Final cinematic on youtube

over the past few weeks time has been spent setting up for the final demonstration. This has involved setting up cameras in matinee for the fly-through and general tweaking and polishing of the final look.
Following feedback from my alpha I went back and tweaked some of the fog values to better match what is in the film.I started getting a lot of contrast in my scene, which I do like the look of however it was not representative of the final look of the film. I’ve also added more volumetric s and particle which include dust motes, steam and ambient fog/mist.
I also managed to gain feedback from an environment artist at RockSteady, a studio which I one day hope to work at. The feedback was very positive with only a few minor criticisms. One was the depth of field was slightly too strong, my initial aim was to use it to make sure the eye wasn’t drawn to the low-detail distant buildings but it was making the scale of the environment look small, almost like a model.
Some more updated images:


Worked abit today on volumetric light shafts, nice and simple using a custom material and a mesh to simulate the effect, nothing that can’t be found online but really adds that polish. The material also fades out based on how close the camera is to avoid any strange visuals of being ‘inside’ the volume
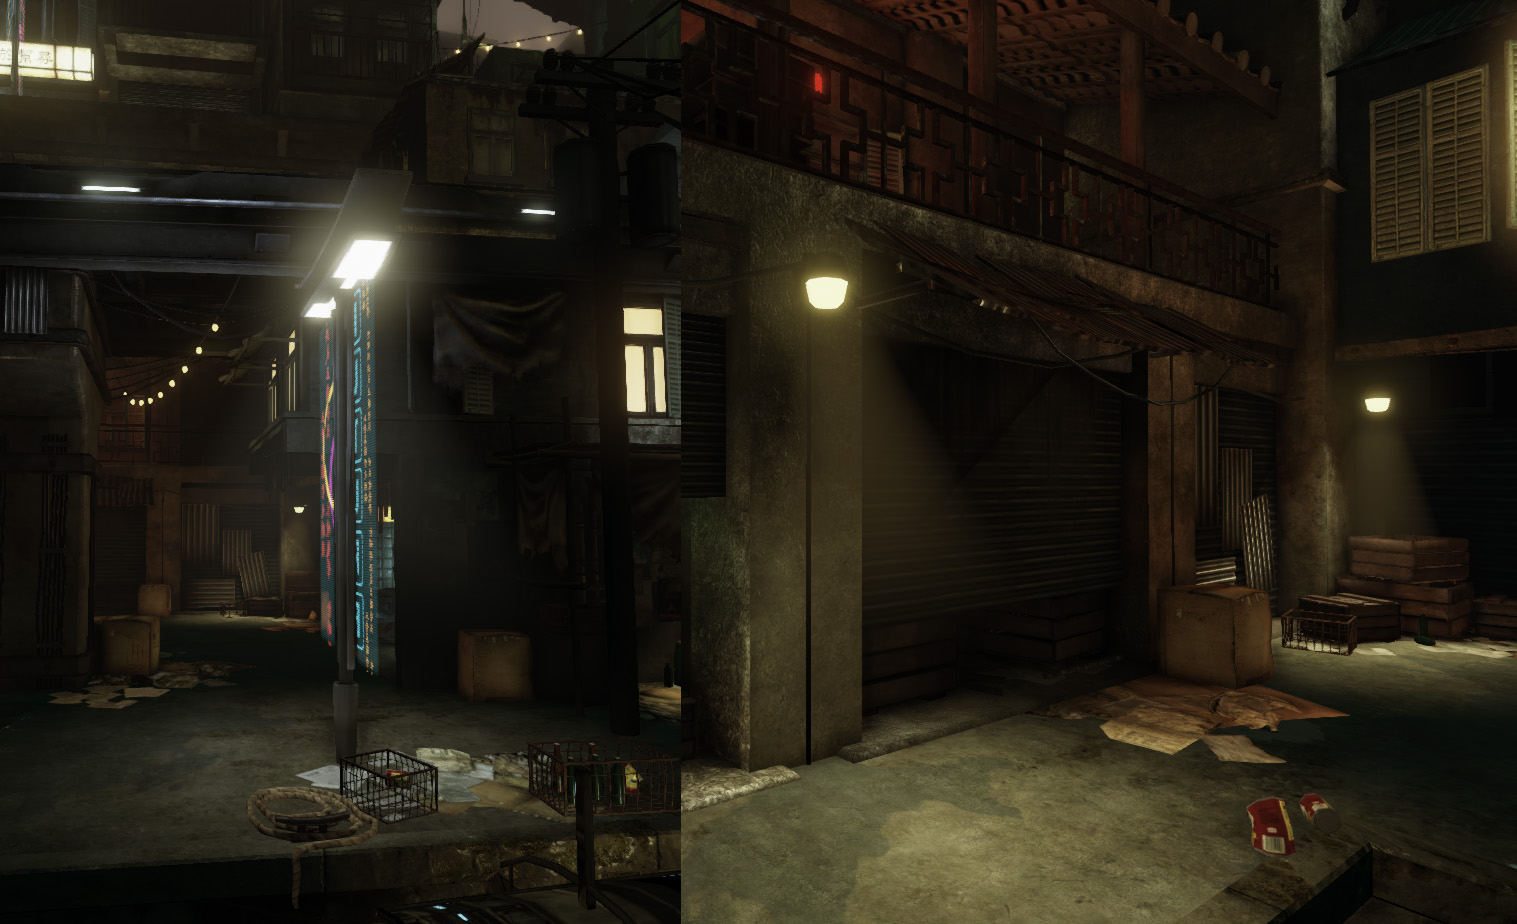
This shows it on a couple of different lights, I use material instances to control the material colour for different lights and just re-use the same mesh moving and scaling till it looks right.

This shot shows the wireframe. The mesh is just a simple cone with the top cut off and a few subdivisions to avoid smoothing errors.
I have now reached th point where basically all of the work I am doing is polish for the level, and really pushing the elements which I thought I wouldnt have time for. This has recently involved pushing the dynamic elements in the scene, really trying to bring the scene to life. My first large addtition has been the train. In the movie scene as the camera pans down across the level the train enters the scene and comes to a stop at what I presume is a station (even though the train is holo). This was something that I didnt have on my list purely because of time but as I am ahead of schedule a blocked it in to see what it would look like. Its a simple animation done in maya of the train coming to a stop, but really pushes the dynamic stuff as the train is covered in adverts and moving images. For the adverts im using various adverts, some from the actual film, which I import as video and add in the material. Again I used a small 512 tiling texture for the train to keep the workflow very quick.

I also finally worked on my holographic banners, which had looked like static flags for a while. For this I wanted to create them entirely using material techniques as opposed to video clips as I wanted to see what I could achieve, also in the movie they are esssentially just animated text with no video footage. I used one texture which I packed different images in the RGB channels, This made it easier to manage and meant I could control all the colouring in the material which is a lot easier for making small changes.


its just a series of panners and roatators added together with the images scale and uv coordinates shifted. For changing the size I am just lerping between two different texture coordinate values. I didnt want to create multiple materials for al the different banners, so Oli showed me a technique which uses the same principle as my grunge overlay. Where the timings of the sine nodes are offset based on the objects position in the world. So for each istance of the adverts all the animations are not in sync and it really breaks up the repetitiveness without having to create brand new images.
My next steps are to finish detailing the level, there are still a couple of spaces that look un-loved, and then start on a few particles. This is something that technically I can do but really dont have the drive to do at the moment as they dont interest me that much. I also plan to go over the entire level checking for glitches and tweaking lighting/colour values.
Been working on the underside of the track and generally more on the left hand side of the scene. This space under the tracks I wanted to look slightly more grungy more trash piled up and generally a bit more run-down than other parts as this would be a space that would naturally get dirty, and have less people living/passing through there due to the track above. There is still some more detailing to go on the area but its starting to feel like complete as I’ve got rid of the empty block-out areas.

I also updated my cubemap textures to reflect my actual level (was previously using placeholder UDK ones) as I felt the level as a whole is virtually complete and there shouldn’t be any major changes that will affect eh map later on. This change is immediately apparent in the water which now reflects the buildings and lights accurately and starts to sell the scene and bring it closer to the movie and looking a lot nicer in general.

My next goal is to finish of the basic ‘Station’ building which sits raised up on the track level. As i want my camera to pan down from the tracks a bit more detail is required here to make it seem like it could be an actual station.
I’ve been making quite good progress over the last week or two getting in some well needed little details which really start pulling the scene together. I’ve just been going through at eye level making and adding detail props where I think there is empty space that doesn’t look quite right. This is the part where I use some creative freedom as there are very few shots of the sort of junk and objects lying around in the small alleyways interiors.
My goal now is to get all the final models in, with the way I have been working I have been dressing up and testing new stuff on the right hand side of the scene which has meant the left side still needs props adding such as the large supports which hold the track up and some perimeter buildings. I am in a good position now though as I have a substantial amount of time for polishing, which I have already started, which consists of finalising texture, adding decals and small scatter props such as bottles and cans.


Ultimately I am ahead of my plan which is good considering I have deviated away from it slightly as I found my enthusiasm for certain tasks diminished and carried on with other tasks as to avoid wasting time. I feel that my initial time spent on creating a robust set of tiling textures and setting up master materials has completely paid off and has streamlined my workflow tremendously, and measn that unless a particular asset is close to the camera or very bespoke I am able to use my exising modular textures and materials which are already set up and this essentially halves the workload, especially towards the point in the project I am at now.
Just going to mention my material workflow for this project as its one of the reasons I can set up assets ingame and tweak the scene values very quickly. This is something i set up right at the beginning and has sped up my workflow tremendously allowing more time to tweak values rather than creating new ones each time. Its not an uncommon method however many people seem to neglect material instancing and how it sould be used.

This is one of my master mateials which controls my main tiling materials in the scene. It controls parameteres for your basic inputs, diffuse/normal/spec etc. and also handles vertex blending between three different textures for each input. It also handles breaking up the tiling by overlaying a dirt texture over the diffuse that is tiled a lot less. To make sure this has maxium effect I offset the dirt textures coordinates based on the meshes position in the world. This means that the tiling overlay coordinates is offset differently for each object that uses the material and therefore appears like a completely unique texture.
I also have multiple other master materials for more bespoke instances such as alpha masked materials, and reflective materials. I choose to break them up as it just made managing different material types easier and for specific cases such as I didnt want all my materials rendering two-sided so have a seperate master for that.
Not only has this stremalined my workflow but is also a very optimised technique and means the engine only has to build one shader for the original master (or parent) material.
As ive been progressing lately ive very much figured out that this scene is completely sold on all the little details and props that it contains. Ive been recently unsatisfied with how it has been coming along and so started to work on small filler props to get me doing something different other than buildings whilst still producing content. 
These props fill the empty spaces and give the eye stuff to look at.
Ive also managed to get the train track in, and my main focus now will be the buildings around and underneath. Once all the blockout buildings have been replaced I will start on a ‘cable pass’ adding lots of intricate wires that i really like the look of. My aim is to hopefully have some of these swinging slightly.

The track uses on Tileable texture bespoke to the model and will then be dressed with cables and signs to break it up


